1 December 2015

Part 3: Page History: IoC using Sitecore API

Following my previous post, I wanted to do a quick Parenthese to talk about simple IoC. Like most of the developers out there we are usually going for Castle.Windosr as IoC on most of our projects. This is working quite nicely in most of the cases and it is quite nice. However, on this special instance, my module code is actually really simple and it feels like Castle.Windsor would be quite an overkill... This would also add another dependency to Castle.Windsor which I did not want. Lucky there is another way using only Sitecore API. Since we already have a dependency on Sitecore then it is fine. Secondly this is really simple to implement... This is based on the great blog post from Anders Laub Christoffersen http://sitecorepromenade.blogspot.com.au/2015/12/part-2-page-history-code-to-retrieve.html

so what is it all about. Well this solution is using Sitecore Type Mapping to resolve your custom types. So what we do is add a configuration patch to add the following section:


This type mapping "type" attribute will point to classes that implement the Interfaces we need to resolve using the IoC. The next step is to write resolver class that will be used to look at the configuration typeMappings and create the object based on the "Type" attribute in from the configuration

    public class TypeResolver
    {
        public static T Resolve(string typeName, object[] parameters = null)
        {
            var xpath = "typeMappings/mapping[@name='" + typeName + "']";
            return (T)(parameters == null ?
              Sitecore.Reflection.ReflectionUtil.CreateObjectFromConfig(xpath) :
              Sitecore.Reflection.ReflectionUtil.CreateObjectFromConfig(xpath, parameters));
        }
    }


we can now use the class to resolve our interfaces based on the config. For instance on our controller, we will be able to do something like

    public class OPageHistoryController : System.Web.Mvc.Controller
    {
        private IPageHistoryService pageHistoryService = TypeResolver.Resolve("PageHistoryService");

        /// 
        /// get the full item history information including the renderings datasources
        /// 
        /// 
        /// 
        /// 
        /// 
        /// 
        public ActionResult GetCurrentItem(string id, string database, string language, string version)
        {
            return Json(pageHistoryService.GetPageHistory(id, database, language, version), JsonRequestBehavior.AllowGet);

        }
    }

Part 2: Page History: code to retrieve history information and datasource information

Following our previous post, we will now see a bit of the code that will allow us to retrieve the information we need to display the history of the item (Page Item) as well as retrieving all datasource items from the presentation renderings.

The first thing is that on the speak application running on the content tab, we need to retrieve the current item: ID, Version and Language so we can pass it on to a Service to retrieve the current item and its history. We want to pass on the version and language information so the content of the tab will be different when the user is changing the version and Language as per:


Well, your SPEAK app is mostly knockout JS based and all your actions to get your Data from will be located on the JS. This is where you will call the Webservice using Ajax Call and retrieve the json object with all your history information. So the easiest way will be to pass on the ID, Version, Language to the Controller call. Those parameters can easily get retrieved form the Query String Parameters using the following JS method:

        GetQueryStringParameter: function (name) {
            name = name.replace(/[\[]/, "\\[").replace(/[\]]/, "\\]");
            var regex = new RegExp("[\\?&]" + name + "=([^&#]*)"),
                results = regex.exec(location.search);
            return results === null ? "" : decodeURIComponent(results[1].replace(/\+/g, " "));
        }

You can then call your webservice using something similar to:

        GetPageHistory: function (app) {
            jQuery.ajax({
                type: "GET",
                dataType: "json",
                url: "/OPageHistory/OPageHistory/GetCurrentItem?id=" + this.GetQueryStringParameter("id") + "&database=" + this.GetQueryStringParameter("database") + "&language=" + this.GetQueryStringParameter("language") + "&version=" + this.GetQueryStringParameter("version"),
                cache: false,
                success: function (data) {
                    app.set("pagehistory", data);
                },
                error: function () {
                    console.log("There was an error in GetPageHistory() function!");
                }
            });
        }

Obviously you may want to retrieve this data when building the model. so the above code will go into the Model Initialisation.

Now this will call the Controller to retrieve the json data and then bind it to the pagehistory. So what we now need to do is to make sure our service is up and running, accessible and return the correct jSon. In this exemple, I wanted to try MVC Area and define the service there. we could do a normal Sitecore WebAPI service but as this code is more a PoC I wanted to go with the Area...


To declare the area, I will be using a pipeline action:


During the pipeline action what you want to do is to check for the routes and if the route for the area does not exist then we will need to add it to the routes list:


                List list = Enumerable.ToList(Enumerable.Where((IEnumerable)RouteTable.Routes, (Func)(route =>
                {
                    Route route1 = route as Route;
                    if (route1 != null && route1.Defaults != null && route1.Defaults.ContainsKey("area"))
                        return string.Equals(route1.Defaults["area"].ToString(), "OPageHistory", StringComparison.Ordinal);
                    return false;
                })));
                if (!Enumerable.Any((IEnumerable)list))
                {
                    new OPageHistoryAreaRegistration().RegisterArea(new AreaRegistrationContext("OPageHistory", RouteTable.Routes));
                }
                else
                {
                    foreach (Route route in list)
                        route.DataTokens["UseNamespaceFallback"] = (object)true;
                }


During the Area registration we will just add the following route:

        context.MapRoute(
                "OPageHistory_default",
                "OPageHistory/{controller}/{action}/{id}",
                (object)new { area = "OPageHistory", action = "Index", id = UrlParameter.Optional },
                (object)new { 
                    controller = ".*OPageHistory"
                }
            );


Now in order to be able to test and access some code you will need to create a controller: OPageHistory with a GetCurrentItem method so the call to /OPageHistory/OPageHistory/GetCurrentItem will resolve... So lets create something like:

    public class OPageHistoryController : System.Web.Mvc.Controller
    {

        /// 
        /// get the full item history information including the renderings datasources
        /// 
        /// 
        /// 
        /// 
        /// 
        /// 
        public ActionResult GetCurrentItem(string id, string database, string language, string version)
        {
            return Json("Hello world", JsonRequestBehavior.AllowGet);

        }
    }


If all is working fine, you should now be able to call controller /OPageHistory/OPageHistory/GetCurrentItem

Now our controller is accessible, we just need to look at the different code to retrieve:


  1. Datasource information: We already saw something like that in a previous blog post that you can review here: http://sitecorepromenade.blogspot.com.au/2015/08/loop-through-renderings-in-presentation.html. This will go through the presentation details and retrieve the renderings. This will then retrieve the datasource associated with the rendering from the RenderingReference.Settings.Datasource... You can also check the code in bitbucket
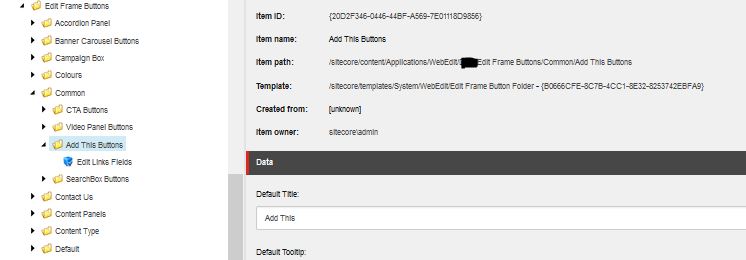
  2. Item History. The item history is in 2 parts: you first need to retrieve the item versions. Once you have the workflow enable, everytime you update the item, sitecore will create a new version. so the item can have multiple versions. Then each version will go through different states: Draft > Awaiting for Approval > Approved...
An easy way to retrieve the versions of the item is to use the following code. This will return an item array:
            var allOlderVersions = item.Versions.GetOlderVersions();


You can then loop through the list of items to get the workflow history. The workflow history (WorkflowEvents) can be retrieved using the workflow provider as per the following
            var workflowProvider = (item.Database.WorkflowProvider as Sitecore.Workflows.Simple.WorkflowProvider);
            if (workflowProvider == null)
                return;

            if (workflowProvider.HistoryStore == null)
                return;

            var workflowEvents = workflowProvider.HistoryStore.GetHistory(item);
            foreach (var wEvent in workflowEvents)
            {
                var vHistory = new VersionHistory(wEvent, item.Database);
                if (vHistory != null)
                    ItemVersionHistory.Add(vHistory);
            }


Combining all, you can easily retrieve all the history for not only the page item but go through the presentation and retrieve the history of each item set as rendering datasources. On the module code in bitbucket, I am also looping through the children of the item from the datasource. The reason behind is that some of the datasource items use their children items. For instance to render an accordion component, I usually set an item as datasource (Accordion Panel) then each of its children will be a section of the accordion...

On the next part, I just wanted to do a quick parenthese to show a quick way of doing IoC using Sitecore...

Part 1: Page History: Create a content Editor Tab running a SPEAK App

As per the previous Blog Post: http://sitecorepromenade.blogspot.com.au/2015/12/viewing-history-of-page-and-components.html, We will first see how to create a Content Editor Tab in Sitecore and link a new SPEAK App that will run in the Tab.


So the first thing we will look is where do we create the content editor. Well as you can imagine it will be in the Core database. So if you open sitecore desktop and switch the context to Core DB, you can then navigate to the following location: /sitecore/content/Applications/Content Editor/Editors


You can create a new folder for your editor item. This will be from the Common/Folder template.
You can also create a new item from the template /sitecore/templates/Sitecore Client/Content editor/Editor
This item will be the Tab Item you want to add to your templates...


When filling in the fields you will notice the URL field. This field is where you specify which application you would like to run. Sitecore will embbed this resources to run in an iframe inside the Tab. You could easily run a normal aspx page there which will be quite simple to create but for the purpose of the PoC, we will select to go for a SPEAK app... The URL for you App will be similar to: /Sitecore/Client/Your Apps/YourAppName


So let's create a new SPEAK App. There are awesome tutorials around on how to create a SPEAK App. One of my favourite is written by Vikram (Thanks for your hard work.):  https://cmsview.wordpress.com/2015/10/07/sitecore-8-for-beginners-creating-speak-application/ 
It explain quite in details how to create a simple app but also how to create a custom one and how to get data from a custom component... This blog post is not intended to be atutorial to show you how to create the SPEAK app so I will not go over all the steps to create the App itself. But in the nutshell you will create a custom SPEAK Component using Sitecore ROCKS:


This will create you the three files: cshtml, and 2 js  files:

Now in sitecore you will have created the application items which will be as per the following:

On the Application presentation, you will have your rendering added:

Now your Speak App is set. Make sure your updating the Content editor item as per the above to point the URL field to the new SPEAK APP:


Now , the last missing link is to make it appear on a page or on the template standard value. To do that, Switch to the Master Database and locate either the page you want your content editor tab and/or your template standard values item where you want to add your tab to. On the Appearance section, locate the "Editors" Field:

Add the new editor item we have created:

This will now bring the new tab as per the following:


The next steps will be looking into the code that will read the item and retrieve all the presentation and history information....

Part 0: Page History Module: Viewing the history of the page and the components items

Many Sitecore Implementation includes different type of items: Page Items but also Data Items. As part of sitecore best practices, we will use Datasources for rendering quite extensively. This means that every pages on our website are composed of one main Item (Page Item itself) plus all the Datasources Items which can be defined in different location.


Although we can use the workflow history to view each individual item history, it is quite troublesome to view all the page elements history.

So I wanted to PoC a quick module that will display a summary of the history on a new Content editor Tab. This is intended to help content editor to view the page elements, their location on the tree as well as their history (Version and Workflow history).


What I wanted to do is giving some sample on:
  • How to add a new Tab on the content Editor
  • How to access presentation information from Code and retrieve history from a version information
  • How to Use Sitecore API as Simple IoC
  • How to use a custom SPEAK App. For the purpose of the sample code, the SPEAK app is only a one custom rendering which could be easily split into several smaller rendering if require. However, making it a full SPEAK App was not the main purpose here.
You can find the final code in my BitBucket: https://bitbucket.org/yannrandri/opagehistory 
The sitecore package can be found in the following location:

So I separated this work in multiple blog post to ensure this one entry was not getting to big...

Please see
Part 1: Page History: Creating a Content editor Tab that run a SPEAK App
Part 2: Page History: code to retrieve history information and datasource information
Part 3: Page History: IoC using Sitecore API


13 November 2015

Castle Windsor trying to resolve all controllers causing error on external modules

Today I was playing with SPEAK trying to make a small app as a module to ease some Page History Visualisation. Well, after creating my rendering, speak app, and my service for the datasource, I decided to try it out on installing the module on one of our existing sitecore 8. This site was using GlassMapper, and using Castle Windsor as Ioc. Well after the successful install, I went and try to access my module and??? I got a 500 coming from my controller:


on my controller I only have something simple and not even using IoC:

       public ActionResult GetCurrentItem(string id, string database, string language, string version)
        {
            PageHistoryService service = new PageHistoryService();
            return Json(service.GetPageHistory(id, database, language, version), JsonRequestBehavior.AllowGet);

        }


Weirdly enough this is actually coming from Castle windsor which is in the existing project.

My Module dll would be with the namespace: XModule.Web
The Project already running in the sitecore would be : XProject.Web

Castle Windsor is defined in the initialisation pipeline as per:


This is quite a generic implementation of Castle Windosr and you will find quite documented on the web. Especially around the WindsorControllerFactory which most probably will look like:

using System;
using System.Web;
using System.Web.Mvc;
using System.Web.Routing;
using Castle.MicroKernel;
using System.Collections;

namespace XProject.Web.DependencyResolution
{
    public class WindsorControllerFactory : DefaultControllerFactory
    {
        private readonly IKernel kernel;

        public WindsorControllerFactory(IKernel kernel)
        {
            this.kernel = kernel;
        }

        public override void ReleaseController(IController controller)
        {
            kernel.ReleaseComponent(controller);
        }

        protected override IController GetControllerInstance(RequestContext requestContext, Type controllerType)
        {
            
            if (controllerType == null)
            {
                throw new HttpException(404, string.Format("The controller for path '{0}' could not be found.", requestContext.HttpContext.Request.Path));
            }

            return (IController)kernel.Resolve(controllerType);
        }
    }
}

Although this is great and working fine in our project itself since we do register our controller on the project, it seems like it is causing some issue when resolving other controllers from other assembly. We could re-edit the project and add some code to ensure the controller from the module assembly is registered as well but that would mean that every time we want to add a new module then we have to edit our castle implementation on the project and add something like

            container.Register(Classes.FromAssemblyNamed("xproject.web").BasedOn().LifestyleScoped());

Well that does not sounds nice to my hear... I would much prefer to not have to recompile an old project when adding module... so what is happening... well when the request hits sitecore pipeline, it goes to the CastleWindsor initialise... then hit the WindsorControllerFactory... as the new dll from the module is not registered (the castle implementation is on an old project...) then it cannot resolve it and the following line will return an exception:

            return (IController)kernel.Resolve(controllerType);

Although this is nice to see the exception so we know castle cannot resolve. wouldn't it be better to not let it die? Shouldn't we try to resolve it another way? for instance using the base method since we inherit from DefaultControllerFactory from System.MVC? my controller in the module would not even need to get resolved. Should we really enforce everyone putting code on our "Shared" Sitecore instance to register our dll for our implementation of Castle? Well I modified slightly the logic in the GetControllerInstance to include a fail safe: try to resolve using Castle but in case there is an issue, try it with the base:

           try
            {
                return (IController)kernel.Resolve(controllerType);
            }
            catch (Exception ex)
            {
                XProject.Web.SitecoreExtensions.Logging.Logger.Warn("Castle windsor could not resolve this controller");
            }
            return base.GetControllerInstance(requestContext, controllerType);

This will still resolve every controller registered. but it will fail graciously and get passed to the Default resolver which will resolve it correctly and so my module controller gets resolved as well...

Just in case, if you do not like try catch, you may also want to try that:

            IHandler handler = ((IKernelInternal)kernel).LoadHandlerByType((string)null, controllerType, null);
            if (handler == null)
            {
                return base.GetControllerInstance(requestContext, controllerType);
            }
            else
            {
                return (IController)kernel.Resolve(controllerType);
            }


This is pretty much the test in Castle that will throw the Component not found exception...

Also refering to my earlier post: http://sitecorepromenade.blogspot.com.au/2015_05_01_archive.html
You will note that implementing the try catch block or the if statement, you will not need to add the following registration:

            container.Register(Classes.FromAssemblyNamed("Sitecore.Speak.Client").BasedOn().LifestylePerWebRequest());
            container.Register(Classes.FromAssemblyNamed("Sitecore.Mvc").BasedOn().LifestylePerWebRequest());
            container.Register(Classes.FromAssemblyNamed("Sitecore.Mvc.DeviceSimulator").BasedOn().LifestylePerWebRequest());
            container.Register(Classes.FromAssemblyNamed("Sitecore.Marketing.Client").BasedOn().LifestylePerWebRequest());
            container.Register(Classes.FromAssemblyNamed("Sitecore.Client.LicenseOptions").BasedOn().LifestylePerWebRequest());

Having say all of that, This is a fail safe. I think it would be better to register the Sitecore one above so it will not fail to resolve with Castle and it will avoid performance hit on the try action... Same thing is true for the module dll. if your implementation of castle can resolve it there would be less performance hit...

SO it would be a better Castle implementation to be able to add external DLL registration without having to rebuild the project... Surely configuration files can help us there... Well My good friend and Geeky Colleague has a nice post about that which I recommend reading:

http://accordingtothegeek.blogspot.com.au/2015/11/castlewindsor-issue-with-mvc-area.html

21 October 2015

Workflow with auto publish related items

Workflow... Workflow... Workflow...
On most of the website we have built, we have used Data Item and Rendering Datasource quite extensively. This is great for any personalisation work and also gives flexibility for displaying components throughout the presentation... Now when setting up the workflow: Obviously we want to have the pages into the workflow but also all the Data Items that are used for the rendering sources.

Let's get the sample workflow as an exemple. This has 3 state: Draft, Awaiting for Approval, Approved. This is quite nice for a page Item so editor will edit the page then submit it for approval. Publisher will then login and approve or reject the page which in term will go published (auto published) or back to Draft if rejected.


So let's put that in our standard value of our templates:

Great we now have all of our item in the workflow...
Now we want the page to be published automatically when approved... well that is great as the sample workflow already has that:


Well Almost... since the item gets published you will also want to publish the related items. That would be best so you don't miss all your datasource items. One awesome thing is that Sitecore has it. You just need to add the related parameter as per below: 


So, now, once our item will go to the approved state it will be automatically published. Well let's try it...
Login as editor, and lock and edit a page by editing one of the component or panel (datasource item content). then save. You will see that the item gets locked but also is your datasource item:


That is great... now let's submit the page through the workflow using the experience editor, which is what our client are actually doing.


Then approve it...

and well... it did not work:

After a bit of investigation, it turns out that approving the item did not approve the datasource item... well I guess it is kind of normal as workflow are usually set on individual item... Even though the publish action on the approved state will published the related items since the Datasource items are not on the final state those are not getting published... So what can we do? what if we only get workflow on the page item? That would not work well as content are stored on the Datasource item. OK, so what if we setup 2 workflow: one for the page item: this will be the 3 steps workflow (the one above) and the second workflow will be for the datasource item. This will be a simplier one with 2 steps: Draft and Approved. on the Approved state we will put an automated publish with sub items:


Now as per the above, what we will do is create a new action on the approved state of the main workflow which will

  • Loop through the Item Renderings
  • Find the Datasources Items
  • Push them to their component workflow to the approve state so those can be published
The PublishComponents action will looks like


You can view some sample of code to loop through the renderings in the presentation on the following post:
http://sitecorepromenade.blogspot.com.au/2015_07_01_archive.html

You can see some sample of code below which can be used to push items through workflow state


        public void Process(WorkflowPipelineArgs args)
        {
            Assert.ArgumentNotNull(args, "args");
            if (args.DataItem == null)
                return;
            using (new SecurityDisabler())
            {
                var presentationService = new PresentationContext();
                if (presentationService == null)
                {
                    Logging.Logger.Warn("Could not resolve the Presentation context");
                }

                IEnumerable dataSourceItems = presentationService.GetRenderingsSettings("main", args.DataItem);

                foreach (var renderingSettingsWrapper in dataSourceItems)
                {
                    if (renderingSettingsWrapper.DataSource != null)
                    {
                        Sitecore.Data.Items.Item datasourceItem;
                        if (!Sitecore.Data.ID.IsID(renderingSettingsWrapper.DataSource))
                            continue;

                        datasourceItem = args.DataItem.Database.GetItem(new ID(renderingSettingsWrapper.DataSource));

                        if (datasourceItem == null)
                            continue;

                        if (datasourceItem[XXX.Common.Constants.ItemIds.Workflows.WorkflowState] !=
                                                        XXX.Common.Constants.ItemIds.Workflows.ComponentsWorkflow.Published)
                        {
                            PublishComponent(args, datasourceItem);
                        }
                    }
                }
            }
        }

        private void PublishComponent(WorkflowPipelineArgs args, Item pageComponent)
        {
            var workflow = pageComponent.Database.WorkflowProvider.GetWorkflow(pageComponent);
            if (workflow != null)
            {
                workflow.Execute(XXX.Common.Constants.ItemIds.Workflows.ComponentsWorkflow.SubmitAction, pageComponent,
                "auto-published due to " + args.DataItem.DisplayName +
                " was published", false, new object[] { });
            }

            if (pageComponent.HasChildren)
            {
                foreach (var childComponent in pageComponent.Children.Where(
                 x => x[XXX.Common.Constants.ItemIds.Workflows.WorkflowState] != XXX.Common.Constants.ItemIds.Workflows.ComponentsWorkflow.Published))
                {
                    PublishComponent(args, childComponent);
                }
            }
        }

Now, when you will start editing your page item, this will draft your component item. then when you will approve your page item, this will then push the component item to Approve state and published...

Hope that will help anyone.

26 September 2015

Sitecore 8 setup a preview site

The out of the box capabilities of sitecore are quite large in terms of preview, experience editor... In most case scenario those are more than enough for content editor to preview their content before publishing the pages. However, from time to time it happens that part of approval process, a link to a person need to be sent so this person can view the page(s) and review it outside the workflow process. This can happen for Legal team to review any information on the page... well Obviously in those cases, it is quite tricky to set them up with a login details so they have to login into sitecore then preview the page.

What we could do in this situation is to setup a Preview site. Although this sounds great you will say that well since only item in the last step of the workflow can be published, this will not really work... Well here comes the power of publishing Target.

You will need to setup a new Publishing Target "Preview":


You can see that on the new Publishing target item you can tick the checkbox: "Preview publishing target". By ticking this checkbox you are allowing items that are not in final state to be published there. That is awesome...

Now, you will need to setup a new database and a new entry in the connection string config


When setting up the new database, you will also need to add the following configuration for the Preview Database:


        $(id)
        Images/database_web.png
        true
        
          
            publishing


        false


          100MB
          50MB
          2500KB
          50MB
          2500KB


You can also setup a few config to ensure that search index will also be created for your new Target DB. Create a new config file on your App_config/Include/XXX folder. Call the file: XXX.ContentSearch.Lucene.Index.Preview.config. Copy the following there:


            $(id)
            $(id)


                preview
                /sitecore


You can now define a new Site in your siteDefinition:


Finally ensure that you update the Sitecore.ContentSearch.DefaultConfigurations.config to add the new strategy:

          
            preview
            
            true


Now the final spte is to ensure that the users you are editing the content is in a role that has write permission on the Publishing target item. This will make sure that your editor will see the target in the publishing window. This will also make sure that he can check or uncheck this target.


Now on the workflow step you will now see that when the page is in the Awaiting for approval, you will still be able to publish it to the Preview site:


13 September 2015

Sitecore 8 and admin page to rebuild aggregation data

As sitecore devs, I am sure you are familiar with all the cool admin pages for clearing cache, viewing configuration file... Well since xDb I always wandered: all my analytics data goes into the mongo DB then Gets aggregatred but what if I need to trigger it manually? Well lucky sitecore thought about it. you have a nice page for that: /sitecore/admin/RebuildReportingDB.aspx.


Well if you start rebuilding straight away, you will encounter an error saying your reporting.secondary DB is not configured.

You can find more information about the secondray.reporting on the following links:

https://doc.sitecore.net/Sitecore%20Experience%20Platform/xDB%20configuration/Walkthrough%20Rebuilding%20the%20reporting%20database


25 August 2015

Sitecore 8 tracking media download

As part of the implementation, we sometime have question about tracking. It happened few time in the past where clients wanted to track PDF download on there website. Using Sitecore 6 was a bit tricky as it was kind of tricky. In the past, I tried a few things including overriding the  Media Handler to trigger an event "Download PDF". Eventhough this was working I did not like the idea of overridding the media handler as it is always painful for Sitecore upgrade and else.

Well I have to say that I was quite pleased to see that this is now handled out of the box on Sitecore 8. This is done through Media Assets. You can find more about it in the following link: https://doc.sitecore.net/sitecore%20experience%20platform/marketing%20taxonomies/classify%20a%20media%20item%20as%20a%20digital%20marketing%20asset

So what do you need to do:

1- Open your Marketing Control Panel and add a New Taxonomy Asset Item:


2- Deploy your Media Asset folder:


3- You can now use your Media Asset on your Media Item directly:

4- Now the only thing left to do is to setup the Event tracking on your media item:

5- setting up the event on the media item, means that everytime someone will request the media item, sitecore will track the Media Assets with the corresponding event: Download. The event already exist in sitecore and is already hooked to the Marketing report:

There you go you are now tracking the Media requests.

Just a quick look at the magic behind, if you quickly uncompile the Sitecore DLL, look for the MediaRequestHandler class that processes '~/media' requests raise 'media:request' event.


Analytics defined in 'Sitecore.Analytics.RobotDetection.Media.MediaRequestHandler' handler that is supposed to do processing will checks:
  1. If Analytics is enabled for the site
  2. If requested item has some data in a tracking field
  3. Launches 'Tracker.StartTracking()' API which would initialize tracker ( 'startAnalytics' pipeline )
Happy coding

16 August 2015

Loop through renderings in presentation and get the associated datasource

Today I was asked for how you can programmatically loop through all the renderings for an item and get the datasource information for each of the rendering. That sounded like an interesting question so I decided to post it here... What we wanted to do was to push the datasource items through workflow when the main item is beeing approved. We will split this in 2 posts so it is not too long here. So on this first post we will just see some code that will loop through the presentation and retrieve the list of item set in the renderings datasource. To make it a little different, lets try to find those where the rendering is inside a specific placeholder and a device

Well I first started to create a context class that will have method like the following:  
        /// 
        /// Return renderings for a specific Placeholder for the current item and a specific device
        /// 
        /// 
        /// 
        /// 
        public IEnumerable GetRenderings(string placeholderKey, string deviceName)
        {
            var currentItem = Sitecore.Context.Item;

            Sitecore.Data.Fields.LayoutField layoutField = new Sitecore.Data.Fields.LayoutField(currentItem);
            Sitecore.Layouts.RenderingReference[] renderings = layoutField.GetReferences(GetDeviceItem(deviceName));

            var filteredRenderingList = new List();

            foreach (var rendering in renderings)
            {
                if (rendering.Placeholder.Contains(placeholderKey))
                {
                    filteredRenderingList.Add(new RenderingItemWrapper(rendering.RenderingItem));
                }
            }

            return filteredRenderingList;
        }

        /// 
        /// Return the settings including datasource ID for the renderings in a specific placeholder 
        /// For current item and specific device
        /// 
        /// 
        /// 
        /// 
        public IEnumerable GetRenderingsSettings(string placeholderKey, string deviceName)
        {
            var currentItem = Sitecore.Context.Item;

            Sitecore.Data.Fields.LayoutField layoutField = new Sitecore.Data.Fields.LayoutField(currentItem);
            Sitecore.Layouts.RenderingReference[] renderings = layoutField.GetReferences(GetDeviceItem(deviceName));

            var filteredRenderingList = new List();

            foreach (var rendering in renderings)
            {
                if (rendering.Placeholder.Contains(placeholderKey))
                {
                    filteredRenderingList.Add(new RenderingSettingsWrapper(rendering.Settings));
                }
            }

            return filteredRenderingList;
        }

        /// 
        /// Get the Device from the context database and the Device name
        /// 
        /// 
        /// 
        private Sitecore.Data.Items.DeviceItem GetDeviceItem(string deviceName)
        {
            if (Sitecore.Data.ID.IsID(deviceName))
            {
                return Sitecore.Context.Database.Resources.Devices.GetAll().Where(d => d.ID.Guid == new Guid(deviceName)).First();
            }
            else
            {
                return Sitecore.Context.Database.Resources.Devices.GetAll().Where(d => d.Name.ToLower() == deviceName.ToLower()).First();
            }
        }


You will note the difference between the IRenderingItemWrapper and IRenderingSettingsWrapper
The later has all the information about the Datasource Item.

Then you can have a method that will loop through your IEnumerable then check your datasource information:

        /// 
        /// Get the Datasources for all renderings inside a placeholders
        /// 
        /// 
        /// 
        public IEnumerable GetRenderingDatasources(string placeholderKey)
        {
            var renderingDatasources = new List();

            IEnumerable renderingsSettings = _presentationContext.GetRenderingsSettings(placeholderKey);
            foreach (var renderingSettings in renderingsSettings)
            {
                if (renderingSettings.DataSource != null)
                {
                    Sitecore.Data.Items.Item datasourceItem;
                    if (Sitecore.Data.ID.IsID(renderingSettings.DataSource))
                    {
                        datasourceItem = _sitecoreContext.GetItem(new Guid(renderingSettings.DataSource));
                    }
                    else
                    {
                        datasourceItem = _sitecoreContext.GetItem(renderingSettings.DataSource);
                    }

                    if (datasourceItem == null)
                        continue;

                    renderingDatasources.Add(datasourceItem);
                }
            }

            return renderingDatasources;
        }


Hope that help anyone...

25 July 2015

Site search and Predictive

I had an interesting requirement about a predictive search. The requirement was to propose terms when a user start entering text on the Search Box:


After a few thoughts we have considered the following approach let's make those terms propositions coming from the website content. As a matter of fact why not using the index to search for the term and return the short list required. What would we need:

  1. WebAPI call from the View
  2. A search Service on the .NET side that will query the index and bring the result
So It sounds quite simple.

So let's setup the Controller for your WebAPI. this could be something like:

namespace XXX.Web.Controllers.XXX.API
{
    [RoutePrefix("webapi/v1/search")]
    public class SuggestiveSearchController : ServicesApiController
    {
        private readonly ISuggestiveSearch _searchService;

        public SuggestiveSearchController(ISuggestiveSearch suggestiveSearchServices)
        {
            _searchService = suggestiveSearchServices;
        }

        [HttpGet]
        [Route("autocomplete")]
        public AutoCompleteSuggestionList Autocomplete(string query)
        {
            if (string.IsNullOrEmpty(query))
                return null;

            return _searchService.AutoCompleteTerm(query);
        }
    }
}


Now, on your View you will have something that calls your WebApi:

            $(document).ready(function () {
                $("#keyword.autocomplete").autocomplete({
                    serviceUrl: '/webapi/v1/search/autocomplete'
                });
            });


Make sure your route will resolve and Sitecore will not resolve your WebAPI route. For that you could use the Attribute routing as per the really nice article from Bart Bovendeerdt on the following link: http://wp-bartbovendeerdtcom.azurewebsites.net/sitecore-8-webapi-v2-mvc-and-attribute-routing/

Then on your service level, you will then retrieve your list of suggestion through Sitecore Content Search - here would be a quick draft...

        public AutoCompleteSuggestionList AutoCompleteTerm(string term)
        {
            var result = new AutoCompleteSuggestionList();
            var list = new List();

            if (String.IsNullOrEmpty(term))
                return result;

            result.query = term;

            var sitecoreService = new SitecoreService(_databaseContext.GetDatabaseName());
            var home = sitecoreService.GetItem(_siteContext.GetStartPath());
            var index = _contentSearchContext.GetIndex(new SitecoreIndexableItem(home));

            using (var context = index.CreateSearchContext(SearchSecurityOptions.DisableSecurityCheck))
            {
                var suggestionsKeywords = context.GetTermsByFieldName("keywords", term);
                foreach (var suggestion in suggestionsKeywords 
                {
                    list.Add(suggestion.Term);
                }
            }
            if (list.Count <= 0)
            {
                result.suggestions = list;
                return result;
 
            }

            result.suggestions = list.Distinct().Take(10).ToList();
            return result;
        }
    }

9 July 2015

Sitecore 8 Upload Zip File with Unpack options broken

Interresting topic for the day. I went on a client side for a training today and I show Sitecore capability for batch upload. Which I used quite all the time on Sitecore 7. So quite confidently, I decided to go ahead and demo it on the fly. Well unfortunately for me this did not go as planned...

I prepared my zip files with the different images, folder and subfolders


Went to the media library to upload the Zip file


Selected the unpack option


And... quite abbarassing


Well this has been reported as a bug and the workaround has been provided. If you face the same issue, you will need to edit the content of the MediaFolder.js file in the location /Website/Sitecore/Shell/Applications/Media/MediaFolder 
replace the line 320 with the following:


 //Sitecore.Support.439231
    this.yUploader.upload(file, this.destination, params);
 //Sitecore.Support.439231


12 June 2015

Experience Editor Edit Frame Button

On a recent project using Sitecore 8, we have extensively used the Experience Editor, which I have to say was really nice to work with. As usual, we have used MVC along side with GlassMapper. For one of our template page, we had some of the fields that needed to be editable but should not show on the page. This is where WebEdits frame buttons came quite handy. That is something you would have never used if you are not using the Experience editor.

So what is the web edit frame buttons. Well those are the buttons that appears when you select an element on your experience editor and allows you to edit either external elements and/or fields that are not displayed on your page. They appears as per the below:


Once you click on the button then you will see a new popup to edit whatever fields you want on the item you want:


To configure it is quite simple:

Go to the Core Database and locate the WebEdit section: 


Locate the folder called Edit Frame Buttons (/sitecore/content/Applications/WebEdit/Edit Frame Buttons), this will give you a good sample of the buttons, especially the Edit one.

You can duplicate the folder and rename it as you would like. Then on the edit button you will be able to edit the following field:


You will notice that on the "Fields" field you will be able to add the "|" separated list of the fields you want to allow user to edit on the frame as per the below:


After defining the fields list available on your Edit button, you will need to do a bit of coding to ensure the webedit frame appears on the Experience Editor. 

1- go to your view rendering and locate the section where you want the frame to appear
2- add the following using:

    using (BeginEditFrame(XXX.Common.Constants.ButtonItemPaths.Common.AddThisButtons, Model.Path))
    {
        
[+ Edit Add This for the Page]
}

The first parameter of your BeginEditFrame will be the path to the Folder you created on the Core DB:
XXX.Common.Constants.ButtonItemPaths.Common.AddThisButtons

will be something like
/sitecore/content/Applications/WebEdit/XXX/Edit Frame Buttons/Common/Add This Buttons

The second Parameter will be the path to the item you would like to edit:
Model.Path

will be something similar to
/sitecore/content/XXX/Home/About Us

There you go... you now have your Webedit buttons on your experience editor.